LIGHTS
There are 4 different lighting effects to choose from. Simply expand the main ‘Lights’ folder and click the eye icon of the light you want to turn on. Depending on the colour of the background you may wish to increase/decrease the intensity of the light. Simply increase/decrease the fill or opacity sliders.
SHADOWS
There are 4 different shadow effects to choose from. Simply expand the main ‘Shadows’ folder and click the eye icon of the shadow you want to turn on. Depending on the colour of the background you may wish to increase/decrease the intensity of the light. Simply increase/decrease the fill or opacity sliders.
FLOWERS & PLANTS
There are 4 different flowers and plants to choose from. Simply expand the main ‘Flowers & Plants’ folder and click the eye icon of the one you want to turn on.
FLOOR
There are 6 different floors to choose from. Simply expand the main ‘Floors’ folder and click the eye icon of the floor you want to turn on. You can also choose to display a solid floor colour, rather than a texture. To change the colour, simply double click on the thumbnail and select a colour from the colour dialog box.
BACKGROUNDS
To change the background, simply expand the ‘Background’ folder. There are 3 wall textures to choose from. Simply click the eye icon of the texture you want. There is a ‘Texture Colour’ layer which can be changed to change the colour of the textures. To change the colour, simply double click on the thumbnail and select a colour from the colour dialog box.
There is also a ‘Background Colour’ layer for selecting a solid colour. To change the colour double click the layer thumbnail and choose a colour from the colour dialog box.
ENVELOPES
There are 3 envelope sizes to choose from, 5 x 5, 7 x 5 and 5 x 7. If you expand these folders you will see each one has 4 folders: Flap, Paper, Envelope, Shadow.
If you want to have the paper completely in front of the envelope then you will need to move the ‘Paper’ folder above the ‘Flap’ folder.
If you want the paper under the flap then you will need to move the ‘Paper’ folder (highlighted orange) below the ‘Flap’ folder (highlighted green). If you expand the flap folder you will see 2 shadow layers highlighted blue. The ‘Open’ shadow will make the flap look likes it open and the ‘Closed’ shadow will make it look like the shadow is closed. Toggle these on/off for the desired effect.
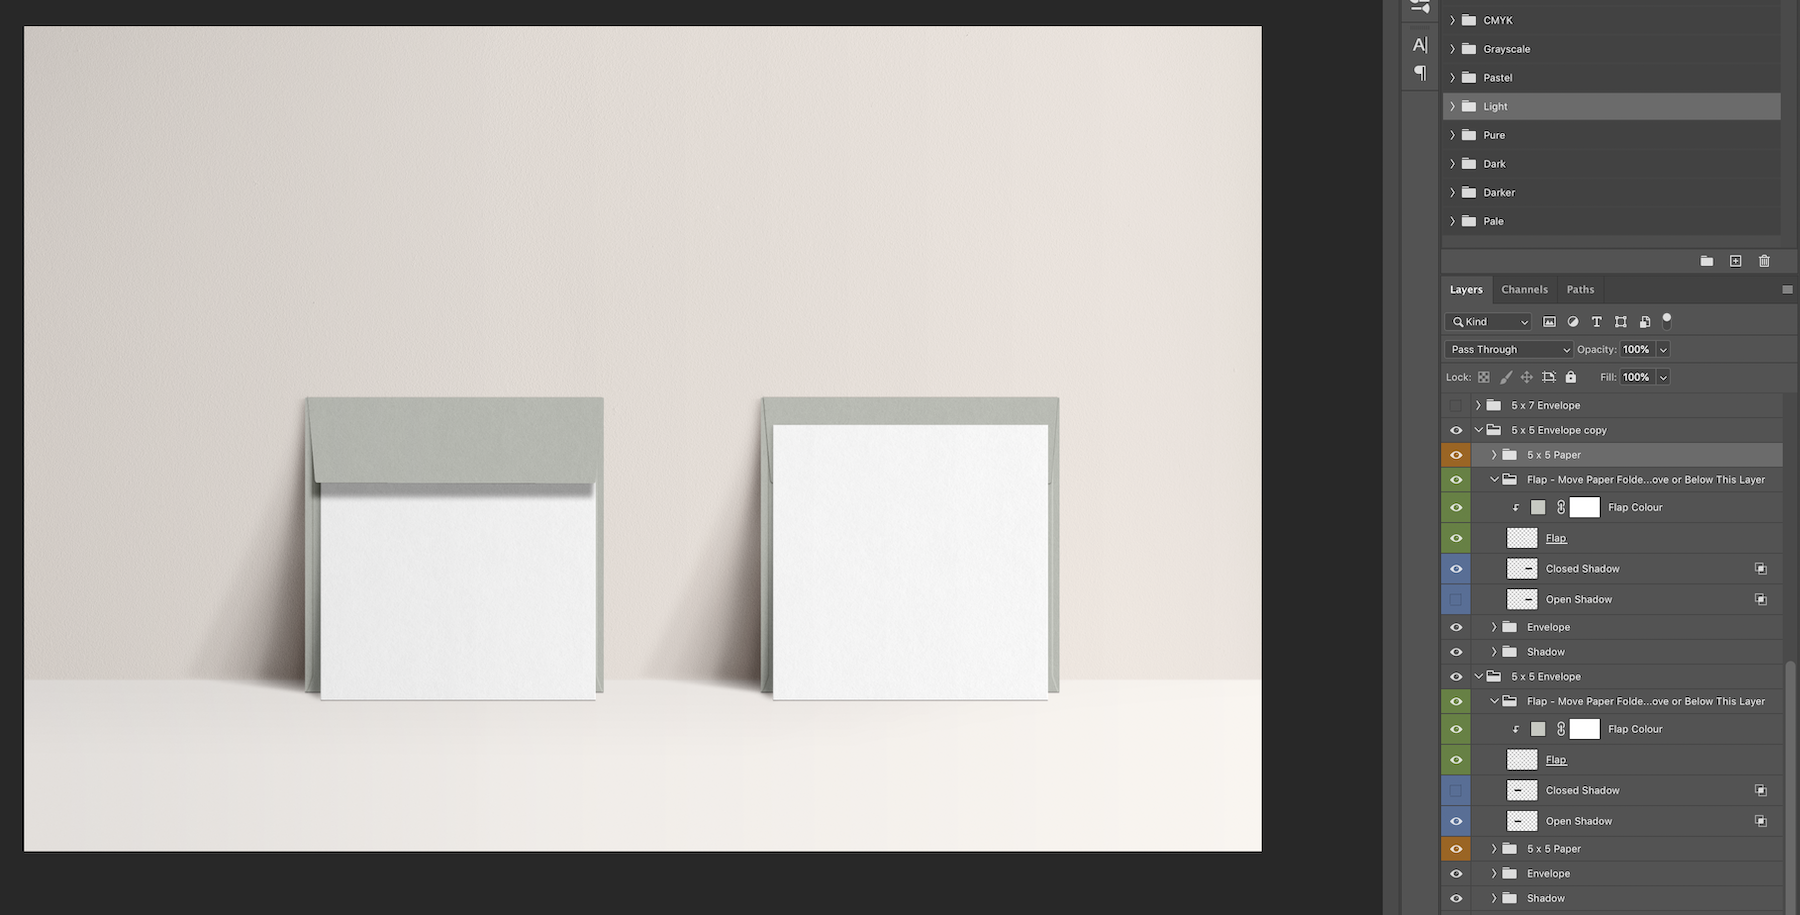
For the envelope on the left, the paper layer has been moved so that it is below the flap layer. The flap has the open shadow toggled on.
For the envelope on the right, the paper layer is placed above the flap layer. The flap has the closed shadow toggled on.
To add your designs to the paper that is in the envelopes, simply follow the process above for adding your designs. To change the colour of the envelopes, simply double click on the colour layer thumbnail and select a colour from the colour dialog box. You will need to do this for both the envelope and flap.
Comments
0 comments
Article is closed for comments.