This mockup kit has several customisation options that can be simply turned on/off by toggling the layers/folders by clicking the eye icons.
Card Textures
There are 2 texture options for the business card.These can turned off or edited by reducing the fill/opacity sliders. Double click the thumbnail of one of the layers highlighted red which opens up a new tab. Here you will find the layers called ‘Texture 1’ and ‘Texture 2’.
Card Colour Tint
There is also an option to add a colour tint. This is also accessed by double clicking the thumbnail of one of the layers highlighted red.

Botanicals
Scenes 1, 5, 6 and 9 contain a botanical object layer. These can be toggled on/off by clicking the eye icon of object folder.
If you wish to use one of these in another scene then you can drag or duplicate the layer into another scene folder. Please note that it might need scaling (making larger or smaller) depending what scene you add it to.
Ceramic object colour
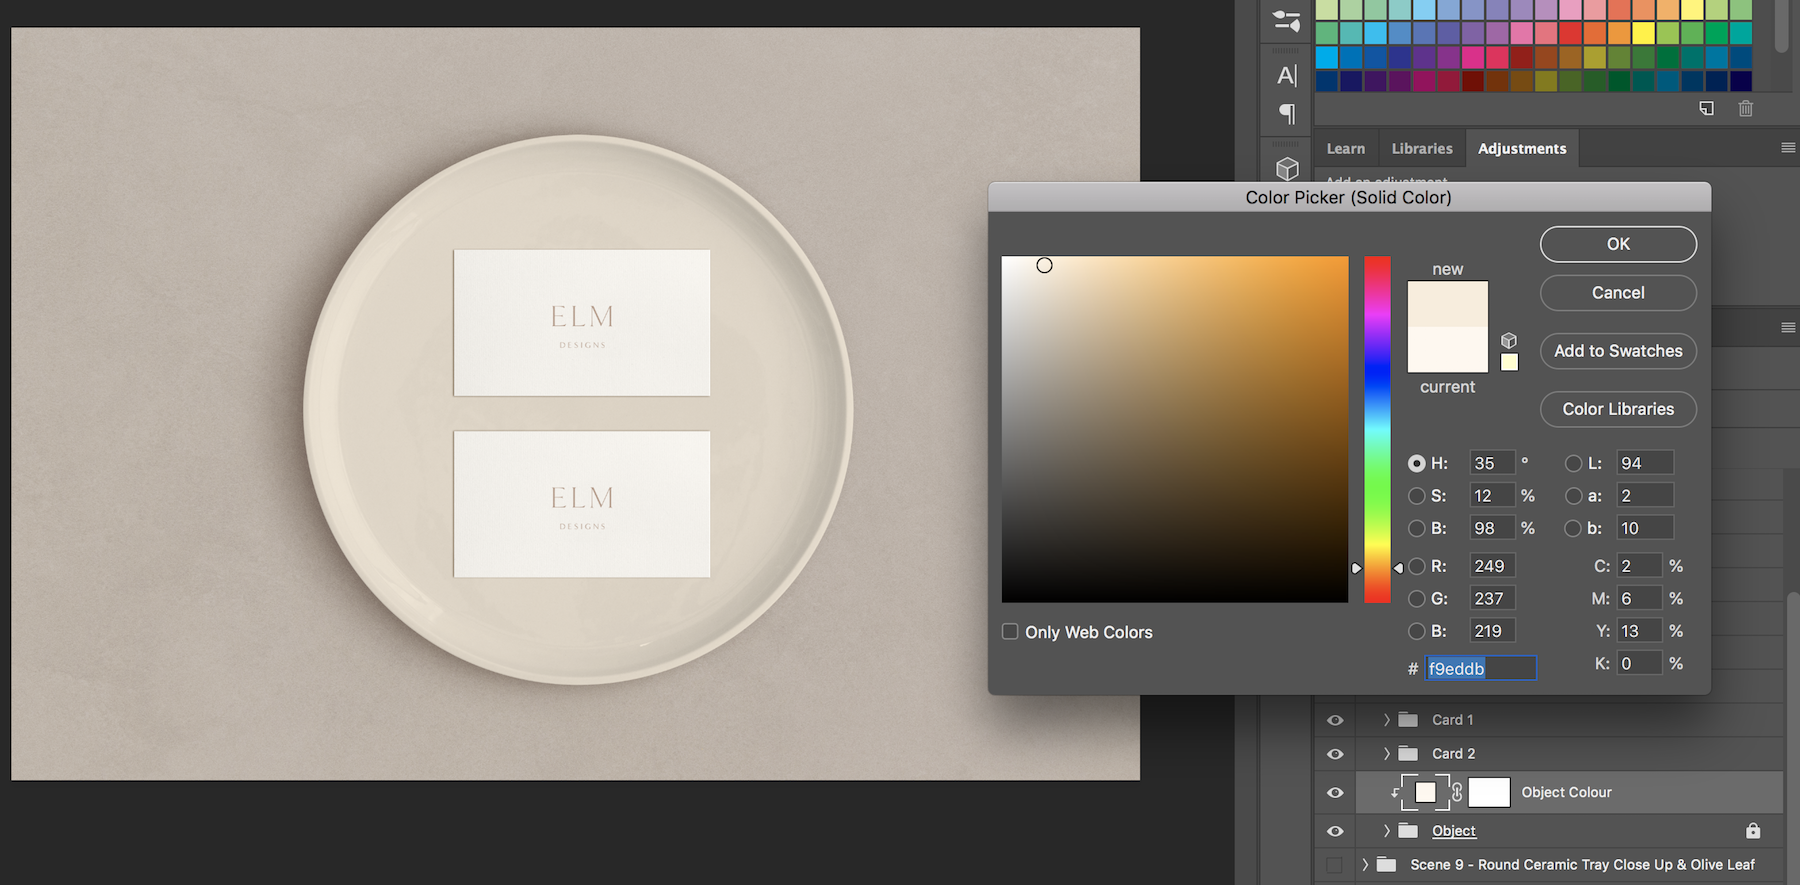
There are 3 ‘scenes’ that have ceramic objects.There is an option to change the colour of these objects. Simply expand the main folder and double click the thumbnail of the colour layer.
For example to change the colour of the oval ceramic tray:
-
Expand the folder ‘Scene 8 - Round Ceramic Tray’
-
Double click the colour thumbnail of the ‘Object Colour’ layer.
-
Select a colour from the colour dialog box. (TIP: this works best with lighter colours)

Select a custom colour for the ceramic objects using the colour dialog box
Backgrounds
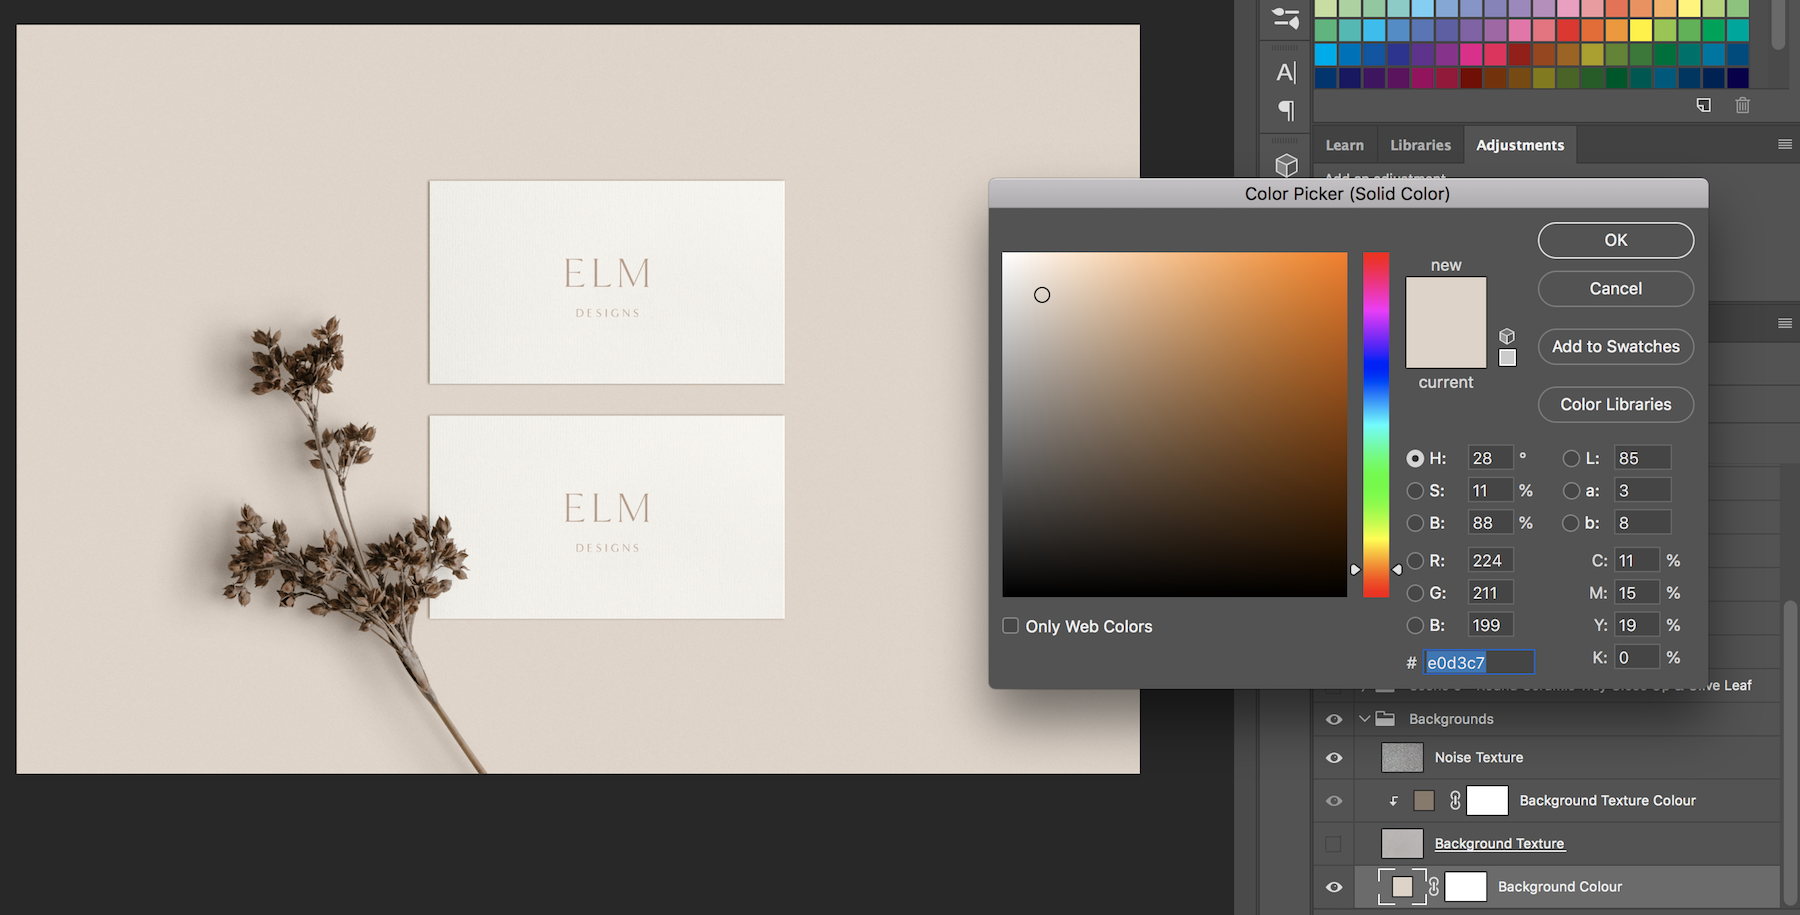
To change the background, simply expand the ‘Backgrounds’ group.There is a ‘Background Texture’ layer which can be customised by changing the colour of the ‘Background Texture Colour’ layer. There is also a ‘Colour’ background which can be made any colour by double clicking the layer thumbnail and choosing a colour.

Customise background colour
Comments
0 comments
Article is closed for comments.