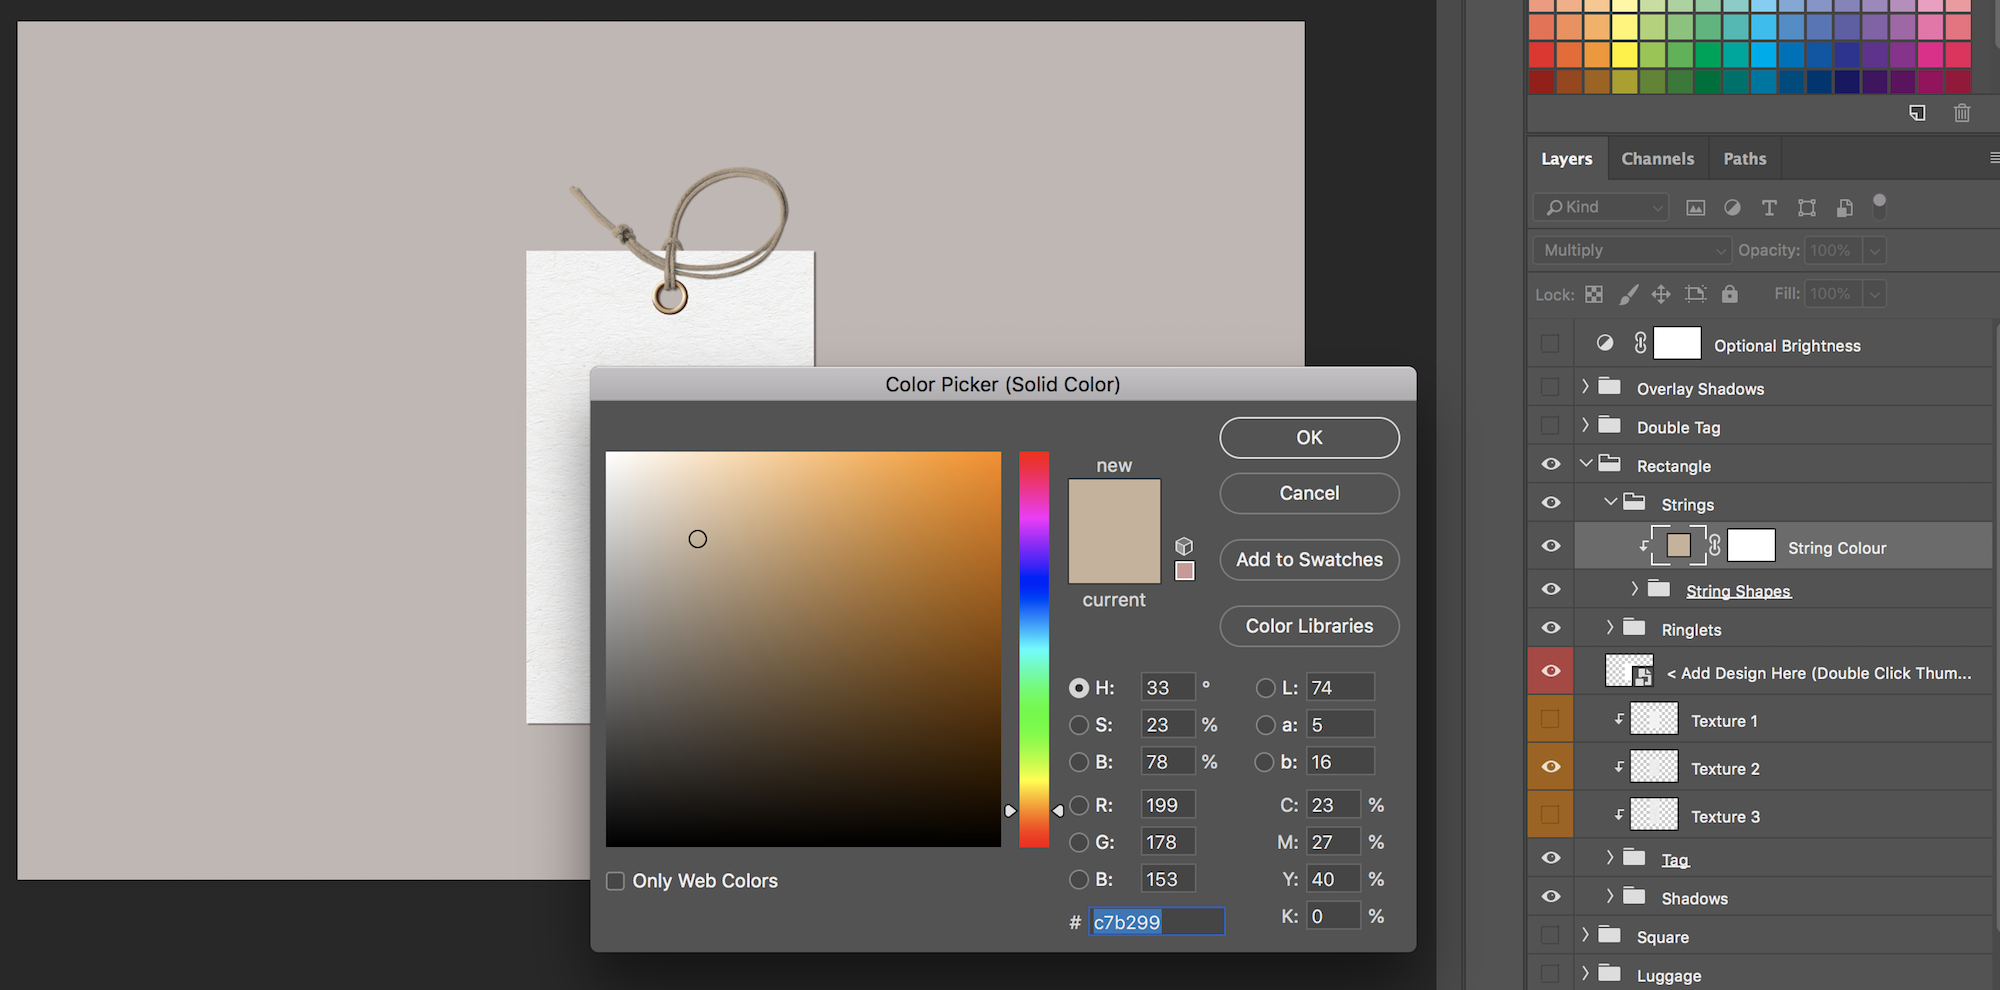
Strings
There are 3 different string shapes: straight, looped and curved.
You can change the colour of the string by firstly expanding the tag shape group. The first layer will be the ‘String Colour’. Double click the layer thumbnail. This will bring up the colour dialog box. Choose a colour and click OK.
To select a different shape string, expand the tag shape group, then expand the ‘Strings’ group. Toggle on or off the string group you want by clicking the ‘eye’ icon.
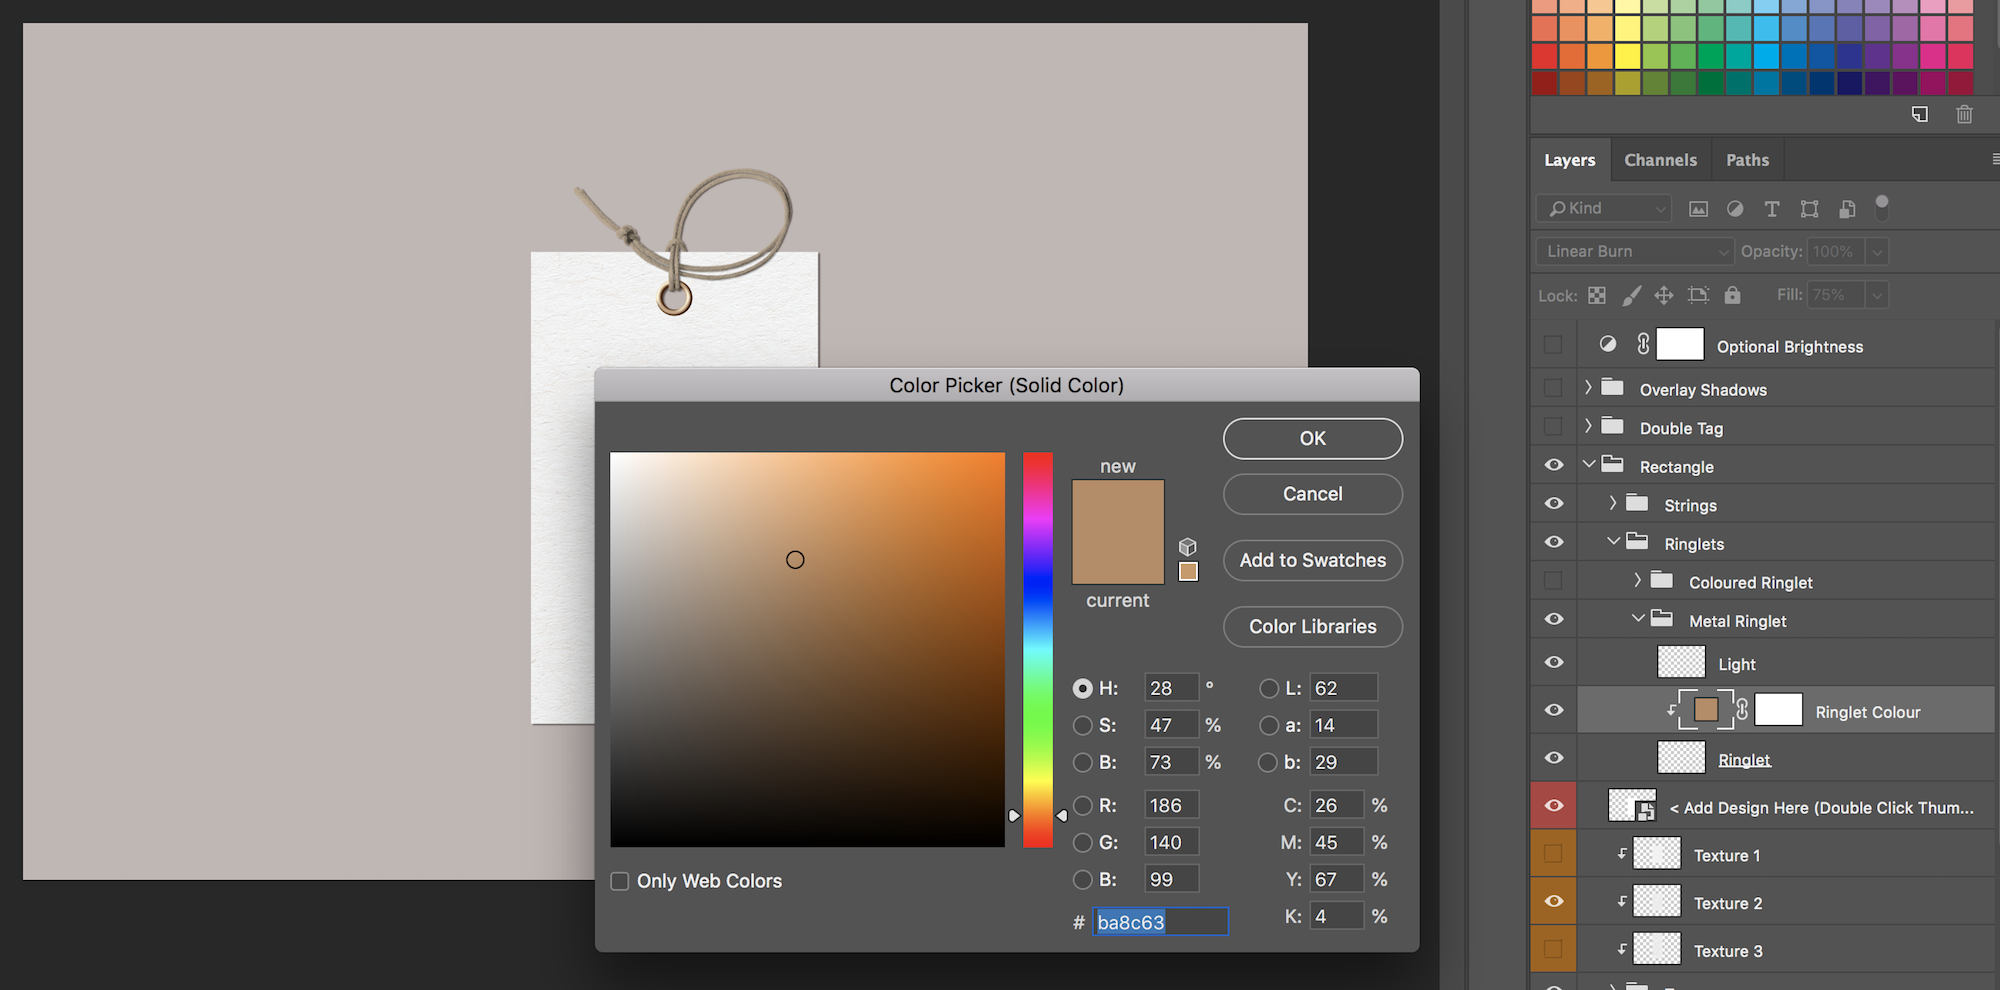
Ringlets
There are 2 different ringlet types: coloured and metal.
You can customise the colour of the ringlet by expanding the ‘Ringlets’ group and then selecting the ringlet group you wish to edit.
Double click the layer thumbnail of the ‘Ringlet Colour’ layer and select a colour from the dialog box. You also have the option to toggle the ringlet on or off.
Tag & String Shadows
There are 4 different tag shadow types: raised, flat, upright on the ground and floating. There are 2 different string shadow types: raised and flat.
Please note: the string and tag shadows are in separate folders so if you select the flat shadow for the string, you will then need to select the flat shadow for the tag.
To change the string shadows, expand the 'Strings' folder and then the folder of the string you want to change. You will see 2 layers highlighted blue called 'Flat Shadow' and 'Raised Shadow'.
To change the tag shadows, expand the 'Tag Shadows' folder highlighted blue and toggle on the shadow that you want.
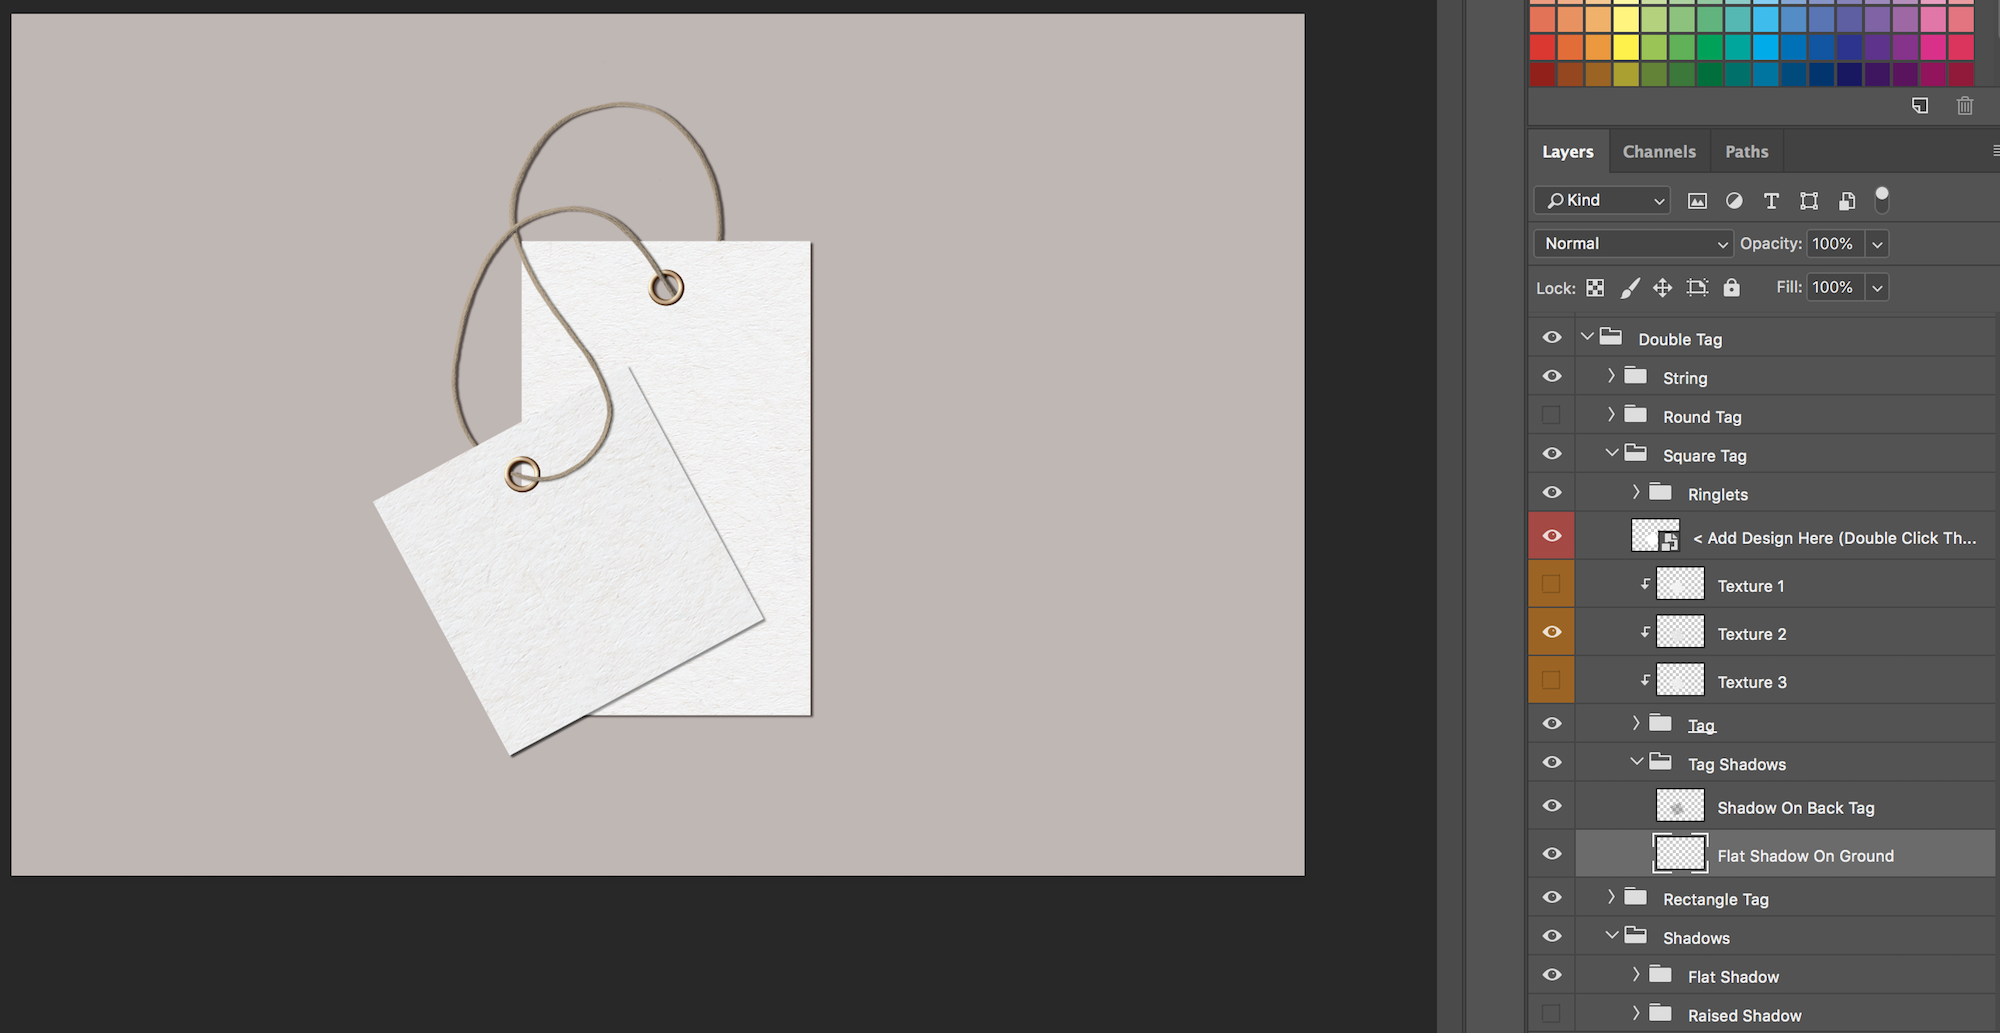
Double Tag
The double tag is slightly different to the other tag shapes. There is an option for the front tag to be square or round and there are only 2 shadow types: Flat & Raised.
There are a few different shadow options such as a shadow from the front tag on the back tag and the shadow from the string on the tags, as well as shadows of the tag and string on the
ground. We recommend that you experiment by toggling all of these different shadow groups on and off to see their effect.
Textures
Each tag shape comes with 3 different textures. You can toggle them on or off to your specification by expanding the tag shape group and they will be highlighted in orange. You can also adjust the opacity of the texture by selecting the texture layer and reducing the Opacity or Fill sliders.
Overlay Shadows
To add a overlay shadow, simply expand the ‘Shadows’ group and toggle on/off the desired shadow. To adjust the appearance of the shadows you can increase/decrease the Opacity and Fill sliders to get the look that you require. You can also choose different blending modes for different effects.
Some of the shadows are ‘full’ shadows, meaning that they affect the whole image. Depending on what background and what your design looks like, you may find that the shadow makes the overall image too dark. At the top of the Layers index there is an ‘Optional Brightness’ layer, which you can turn on and adjust if you want to brighten the image.
Backgrounds
To change the background, simply expand the ‘Backgrounds’ group and toggle on/off the desired background. There is also a ‘Colour’ background which can be made any colour by double clicking the layer thumbnail and choosing a colour.
Toggling on/off different texture layers and adjusting the Opacity and Fill sliders can produce lots of different effects. You can also choose a different blending mode for the textures such a ‘Multiply’ or ‘Linear Burn’. This means that the texture will blend with whatever layer is underneath it. Feel free to get creative!
Included in the backgrounds is also an optional noise layer, if you’d like to create a more ‘vintage’ feel to your images.
Comments
0 comments
Article is closed for comments.