PHONE
If you expand the main ‘Phone’ group by clicking the small down arrow, you will see several folders. The layers highlighted red or orange are for adding your screen designs. For the phones you will see 2 red and/or 2 orange folders. This is so that you can show a full screen or a screen with a cut out (notch). The other folders are different size/shaped bevels which surround the screen. Simply toggle on/off the bevel that you would like to show by clicking the eye icon of that folder group.
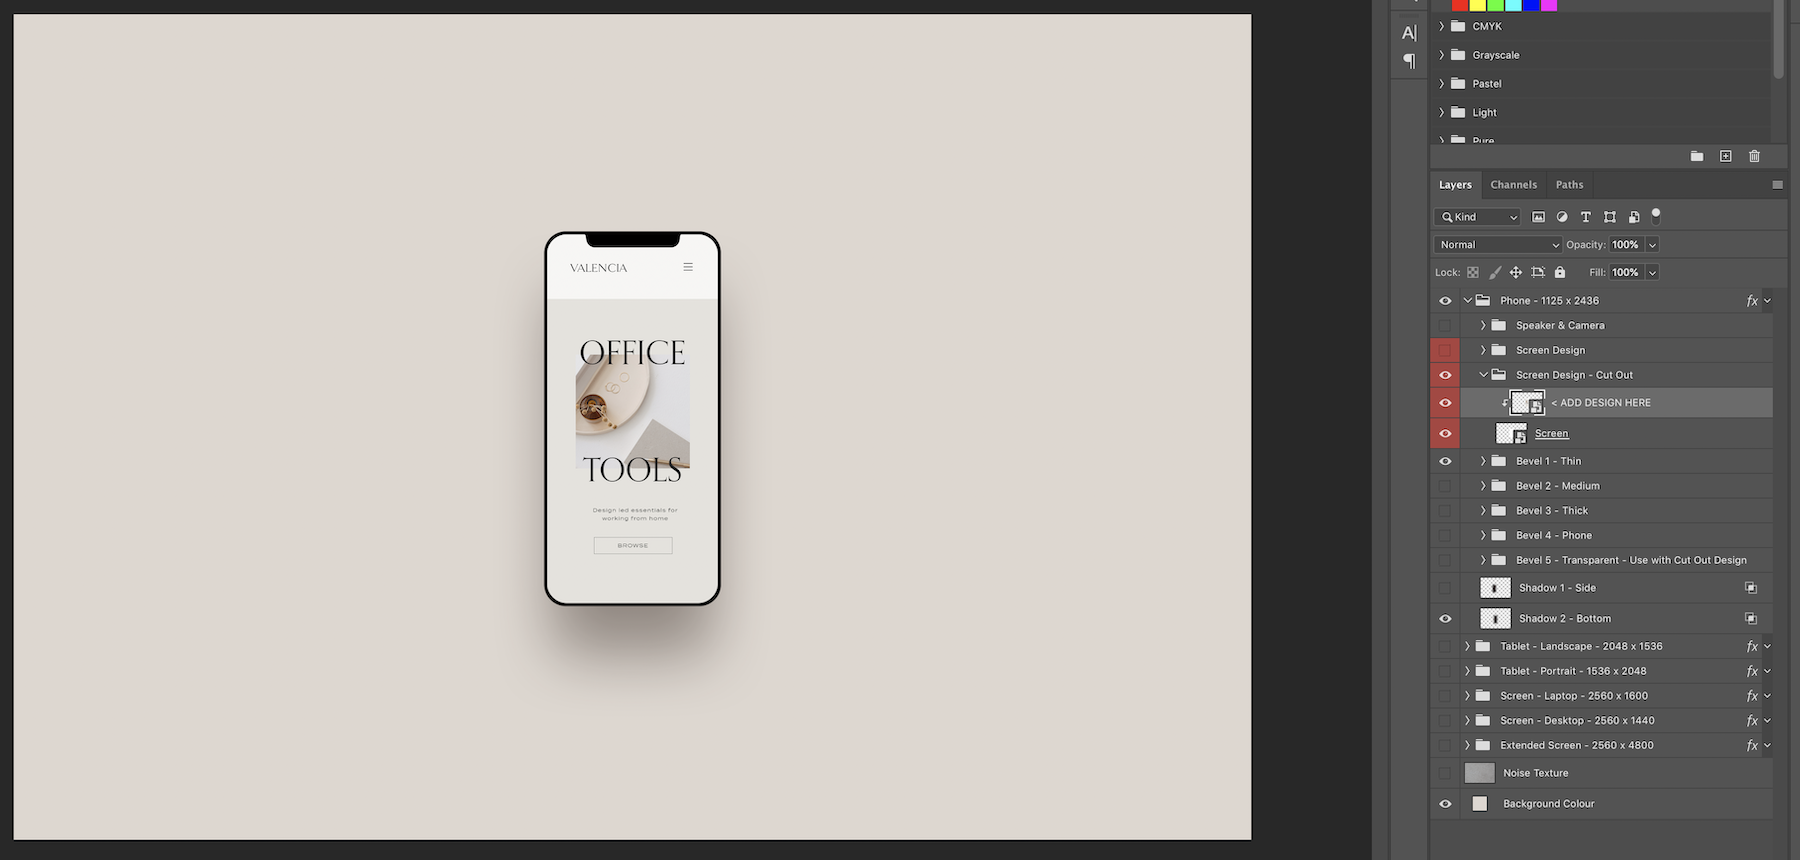
To show the screen with the cut out simply toggle on the ’Screen Design - Cut Out’ folder. Make sure you toggle off the ‘Screen Design’ folder.
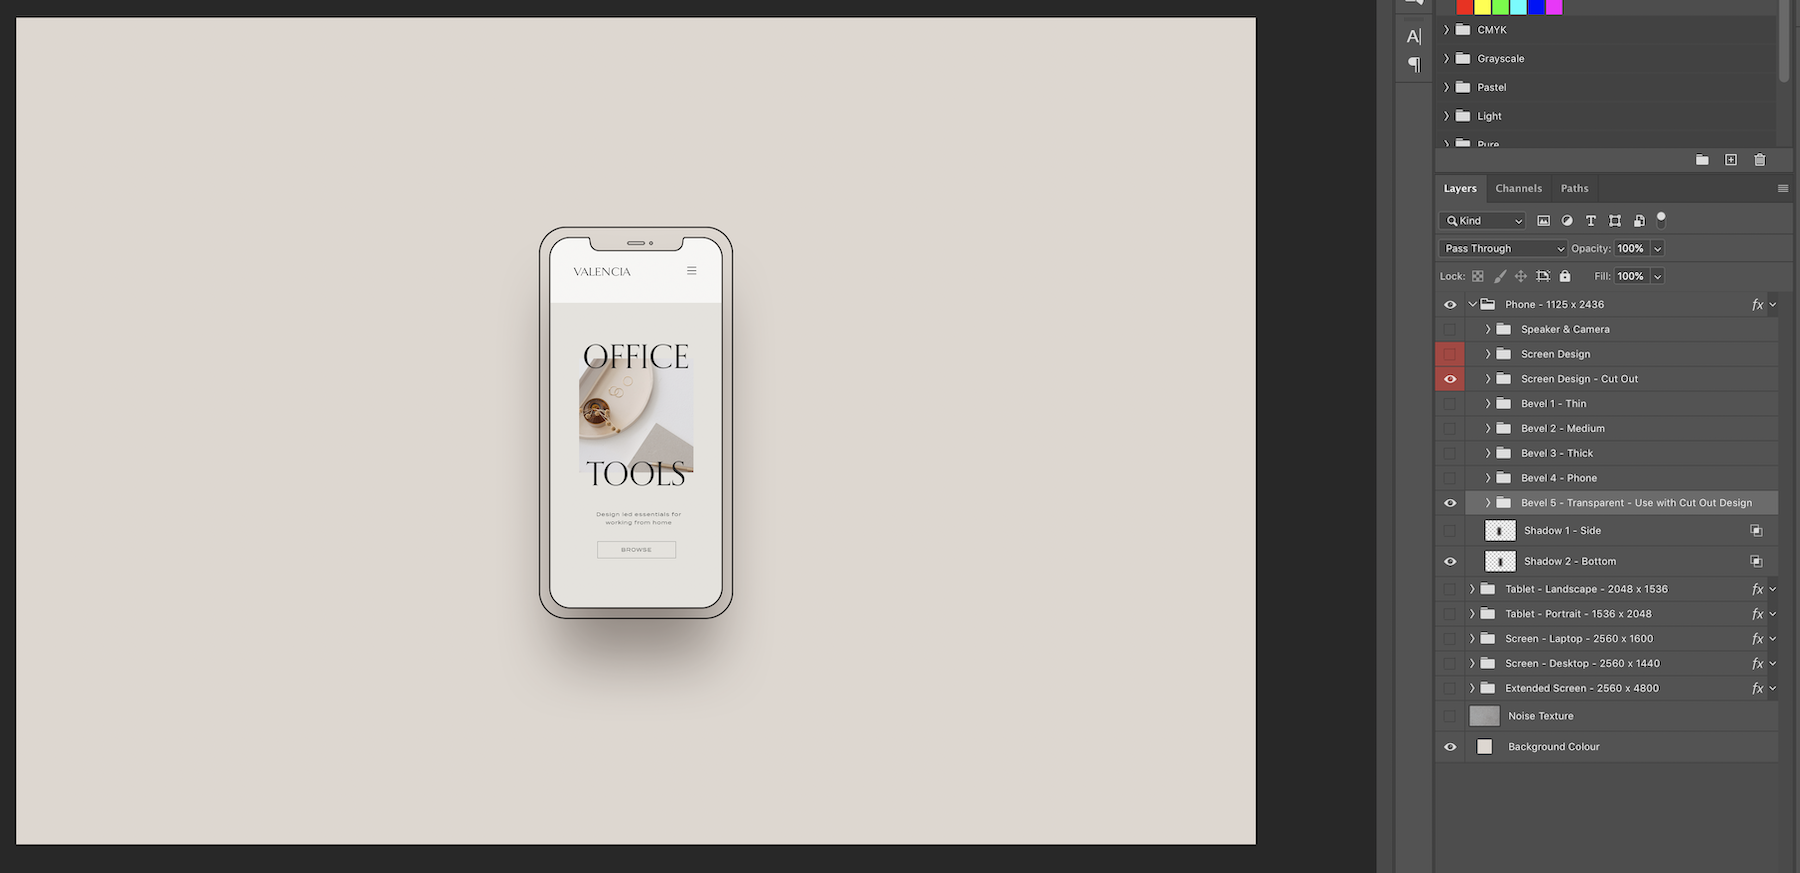
Note: Bevel 5 should be used with the ‘Screen Design - Cut out’ toggled on.
TABLET - LANDSCAPE & PORTRAIT
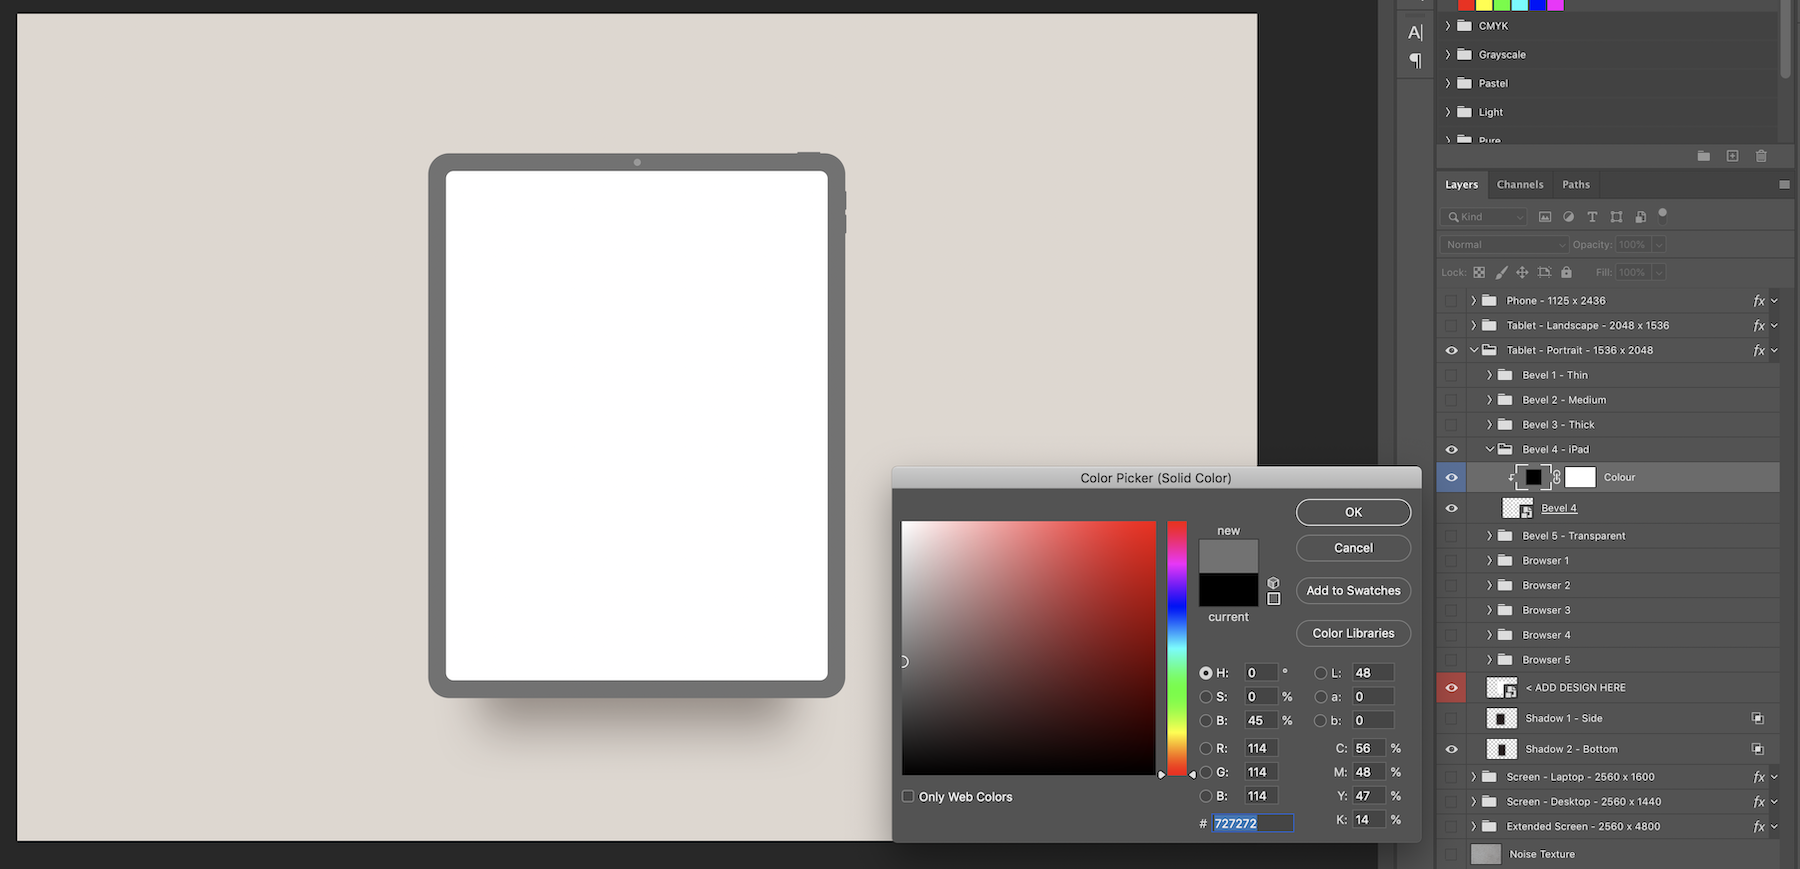
If you expand the main ‘Tablet - Landscape’ or ‘Tablet - Portrait’ groups by clicking the small down arrow, you will see several folders. The layers highlighted red or orange are for adding your screen designs. The other folders are different size/shaped bevels and browsers which surround the screens. Simply toggle on/off the bevel or browser that you would like to show by clicking the eye icon of that folder group.
LAPTOP & DESKTOP SCREEN SIZES
If you expand the main ‘Screen - Laptop’ or ‘Screen - Desktop’ groups by clicking the small down arrow, you will see several folders. The layers highlighted red or orange are for adding your screen designs. The other folders are different size/shaped bevels and browsers which surround the screens. Simply toggle on/off the bevel or browser that you would like to show by clicking the eye icon of that folder group.
EXTENDED SCREEN SIZE
If you expand the main ‘Extended - Screen’ group by clicking the small down arrow, you will see several folders. The layers highlighted red or orange are for adding your screen designs. The other folders are different size/shaped bevels and browsers which surround the screen. Simply toggle on/off the bevel or browser that you would like to show by clicking the eye icon of that folder group.
Note: The size of the screen is 2560 x 4800px. We recommend using a ‘Screen Capture’ browser extension so that you can capture your whole website page and then scale the screen capture to fill the white space.
SHADOWS
There are 2 shadow layer options which can be toggled on/off. One is to the side and one is to the bottom. They both give the impression of the screen/device floating. There is a third shadow which uses Photoshop’s layer style effect. On the main folder on the right hand side you will see the letter fx. Click the down arrow next to this and click the eye icon on/off next to ‘Drop Shadow’ if you want to show this shadow. This gives the impression that the screen/device is flat on the surface.
BEVEL / BROWSER COLOUR
To change the colour of the bevels and browsers, simply expand the bevel or browser folder. There will be a layer highlighted blue. Double click the colour thumbnail of the colour layer. This will bring up a colour dialog box. Select a colour and click OK.
BACKGROUNDS
To change the background colour, simply double click on the colour thumbnail and select a colour from the colour dialog box. There is also a ‘Noise Texture’ layer that can be toggled on/off. Depending on what the colour the background is or what effect you would like you may need to increase/decrease the fill/opacity sliders for this layer.
Comments
0 comments
Article is closed for comments.